Snowflake Cortex Agents
Connect the Alation-hosted MCP server to Snowflake as an MCP connector, then attach it to a Cortex Agent so the agent can ground its answers in your catalog.
Prerequisites
Section titled “Prerequisites”- Permission in Snowflake to create an MCP connector.
- Server Admin access to your Alation instance to create the OAuth client.
Creating the OAuth client
Section titled “Creating the OAuth client”The connector authenticates with user-initiated OAuth. Snowflake needs two redirect URIs registered on the client:
- The static URI:
https://identity.snowflake.com/oauth2/callback - Your deployment’s Snowsight URI: run
SELECT SYSTEM$ALLOWLIST();in Snowflake and find theSNOWSIGHT_DEPLOYMENTentry that starts withapps-api. Prefix it withhttps://.
Create the OAuth client in the Alation UI following the user-initiated OAuth guide, add both redirect URIs, and copy the Client ID and Client Secret.
Adding the MCP connector in Snowsight
Section titled “Adding the MCP connector in Snowsight”-
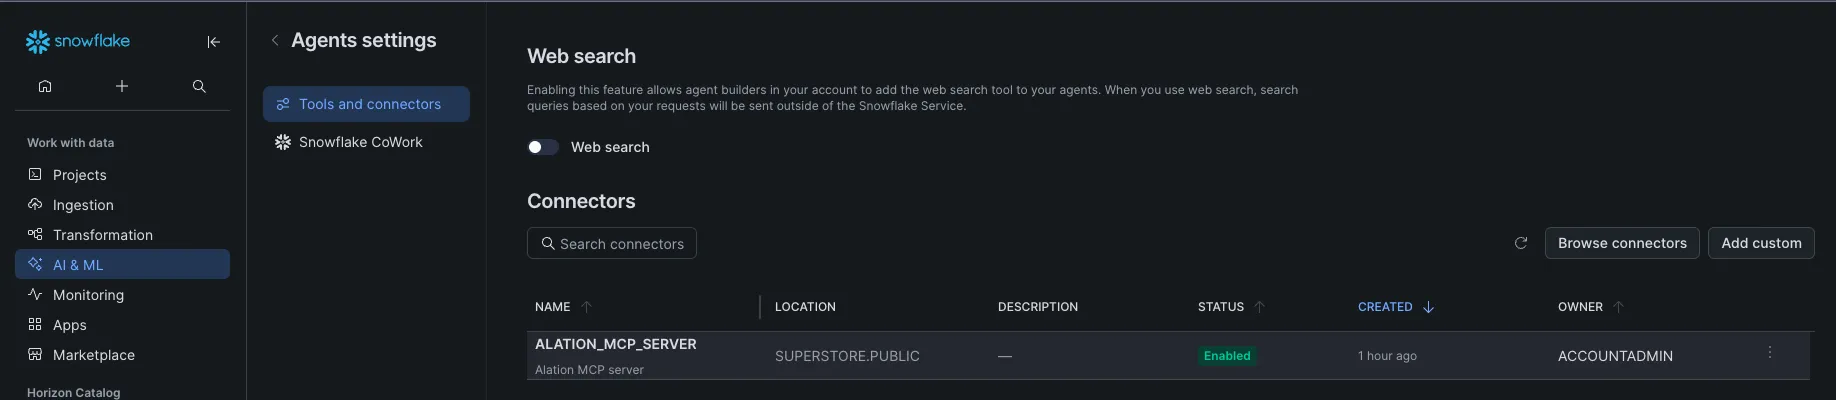
Open Tools and Connectors
Log into Snowsight, select AI & ML » Agents from the left navigation, click Settings, and choose Tools and Connectors.
-
Add a custom connector
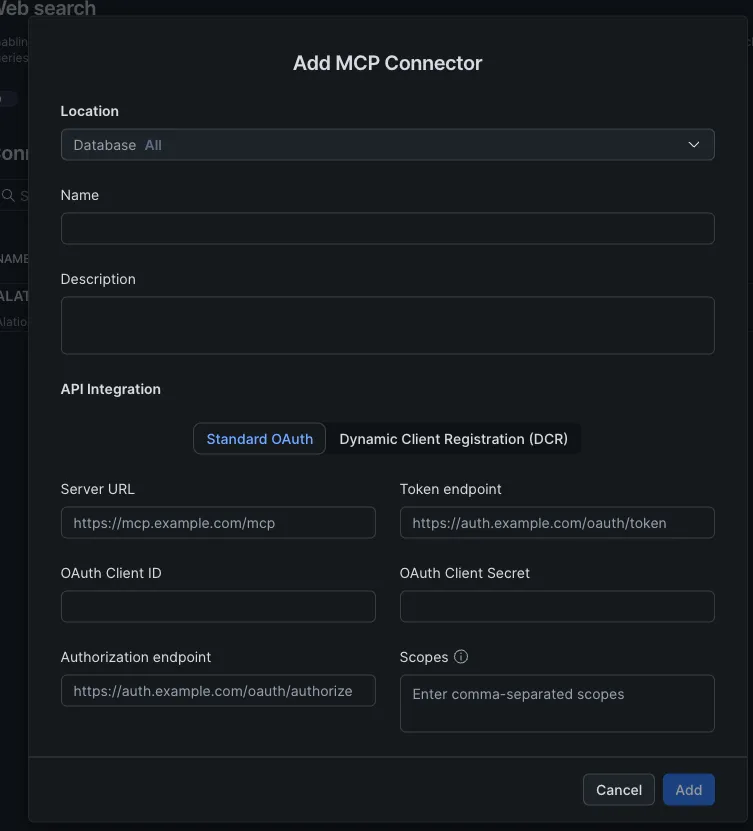
Click Add Custom to open the Add MCP Connector modal.
-
Fill in the connector
Field Value Location The database and schema where the connector should be available Name / Description A clear name and a description that tells the agent what the server provides API Integration Standard OAuth Server URL https://your-alation-instance.alationcloud.com/ai/mcp/— the trailing slash is requiredOAuth Client ID / Secret From the OAuth client you created Authorization endpoint https://your-alation-instance.alationcloud.com/oauth/v1/authorize/Token endpoint https://your-alation-instance.alationcloud.com/oauth/v1/token/Scopes openid -
Add it
Click Add. The connector appears under Connectors with status Enabled — authentication happens later, per user, when the connector is first used.
Alternative: create the connector with SQL
An MCP connector is an API integration linked to an external MCP server object:
-- Create the API integration with the OAuth configurationCREATE API INTEGRATION alation_mcp_integration  API_PROVIDER = external_mcp  API_ALLOWED_PREFIXES = ('https://your-alation-instance.alationcloud.com/ai/mcp/')  API_USER_AUTHENTICATION = (    TYPE = OAUTH2    OAUTH_CLIENT_ID = '<client-id>'    OAUTH_CLIENT_SECRET = '<client-secret>'    OAUTH_TOKEN_ENDPOINT = 'https://your-alation-instance.alationcloud.com/oauth/v1/token'    OAUTH_CLIENT_AUTH_METHOD = CLIENT_SECRET_BASIC    OAUTH_AUTHORIZATION_ENDPOINT = 'https://your-alation-instance.alationcloud.com/oauth/v1/authorize'    OAUTH_ALLOWED_SCOPES = ('openid')    OAUTH_REFRESH_TOKEN_VALIDITY = 86400  )  ENABLED = TRUE;
-- Create the external MCP server in the target databaseUSE DATABASE <your-database>;CREATE EXTERNAL MCP SERVER alation_mcp_server  WITH DISPLAY_NAME = 'Alation MCP server'  URL = 'https://your-alation-instance.alationcloud.com/ai/mcp/'  API_INTEGRATION = alation_mcp_integration;
The connector then shows up in Settings » Tools and Connectors like one created in the UI.
Adding the connector to a Cortex Agent
Section titled “Adding the connector to a Cortex Agent”-
Open your agent
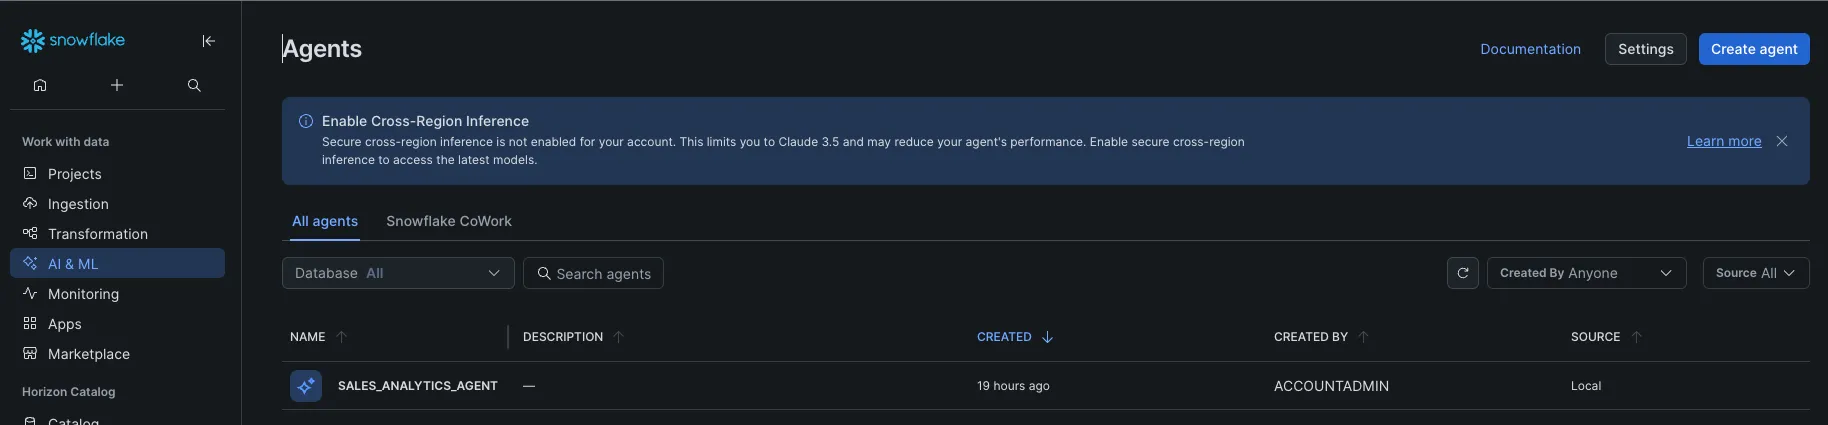
From AI & ML » Agents, create a new agent or select an existing one and click Edit.
-
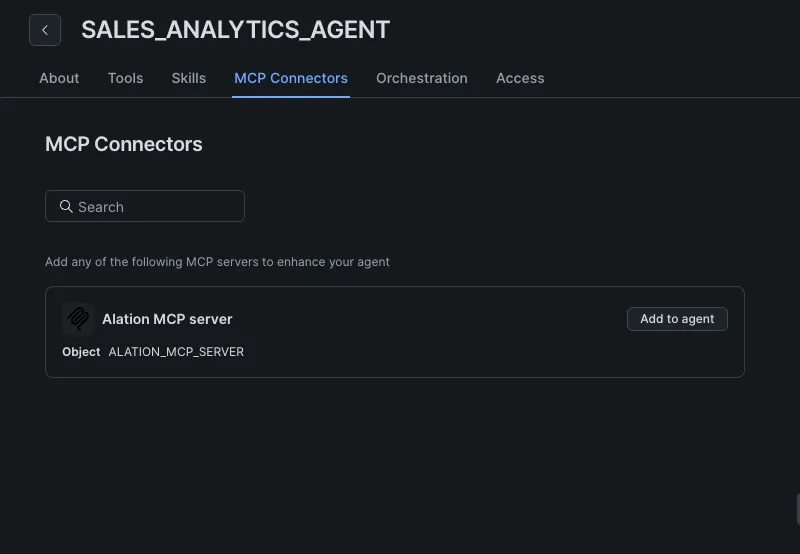
Attach the connector
On the MCP Connectors tab, find the Alation connector and click Add to agent.
-
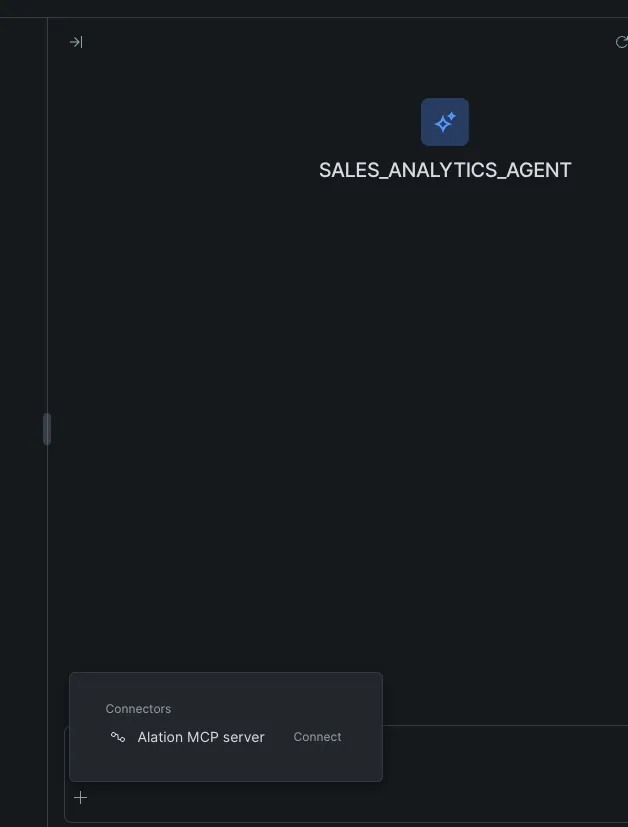
Connect as yourself
In the agent’s chat window, click the + button; the Alation connector appears in the Connectors list. Click Connect and sign in to your Alation instance in the browser window that opens (username/password or SSO).
-
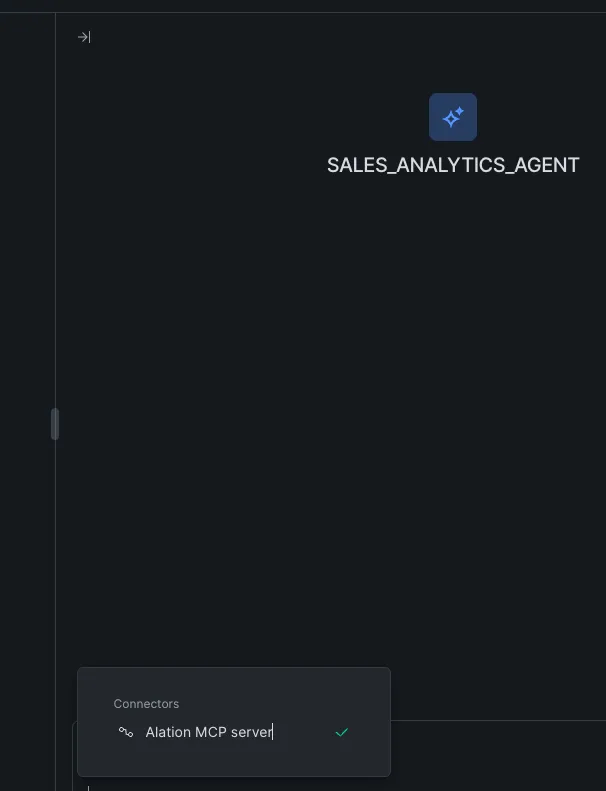
Verify
A green check appears against the connector once authentication succeeds. Because each user connects individually, every request to Alation runs with that user’s own permissions.
Related
Section titled “Related”- Using the MCP server — what the connector exposes, example prompts, and custom MCP servers with curated tool sets.
- Query Agent Studio from Snowflake — the reverse direction, calling agents from SQL over REST.