Scheduling Flows
This guide explains how to schedule flows to run automatically at defined intervals—daily, weekly, or at custom times.
Prerequisites
Section titled “Prerequisites”Before scheduling a flow:
- You must have a saved flow ready to schedule
- An admin must have enabled scheduling for your tenant (one-time setup)
- You need to complete a one-time authorization (see below)
Admin setup (one-time)
Section titled “Admin setup (one-time)”-
Generate a JWT access token
Follow the Machine-to-Machine OAuth guide to:
- Create an OAuth Client Application in Alation (requires Server Admin role)
- Generate a JWT access token using
client_idandclient_secret
-
Register the OAuth app for scheduling
Call the registration endpoint with your admin JWT token:
Terminal window curl -X POST "https://your-alation-instance.alationcloud.com/ai/api/v1/oauth_app/register" \-H "Authorization: Bearer <admin_jwt_token>" \-H "Content-Type: application/json"A successful response confirms scheduling is enabled:
{"success": true,"message": "OAuth app registered successfully"} -
Verify scheduling is available
Users should now see the Authorize button in the Schedule tab instead of a disabled state.
Authorization
Section titled “Authorization”Scheduled flows run without you being logged in, so the system needs permission to act on your behalf. This is a one-time setup.
Authorizing for the first time
Section titled “Authorizing for the first time”-
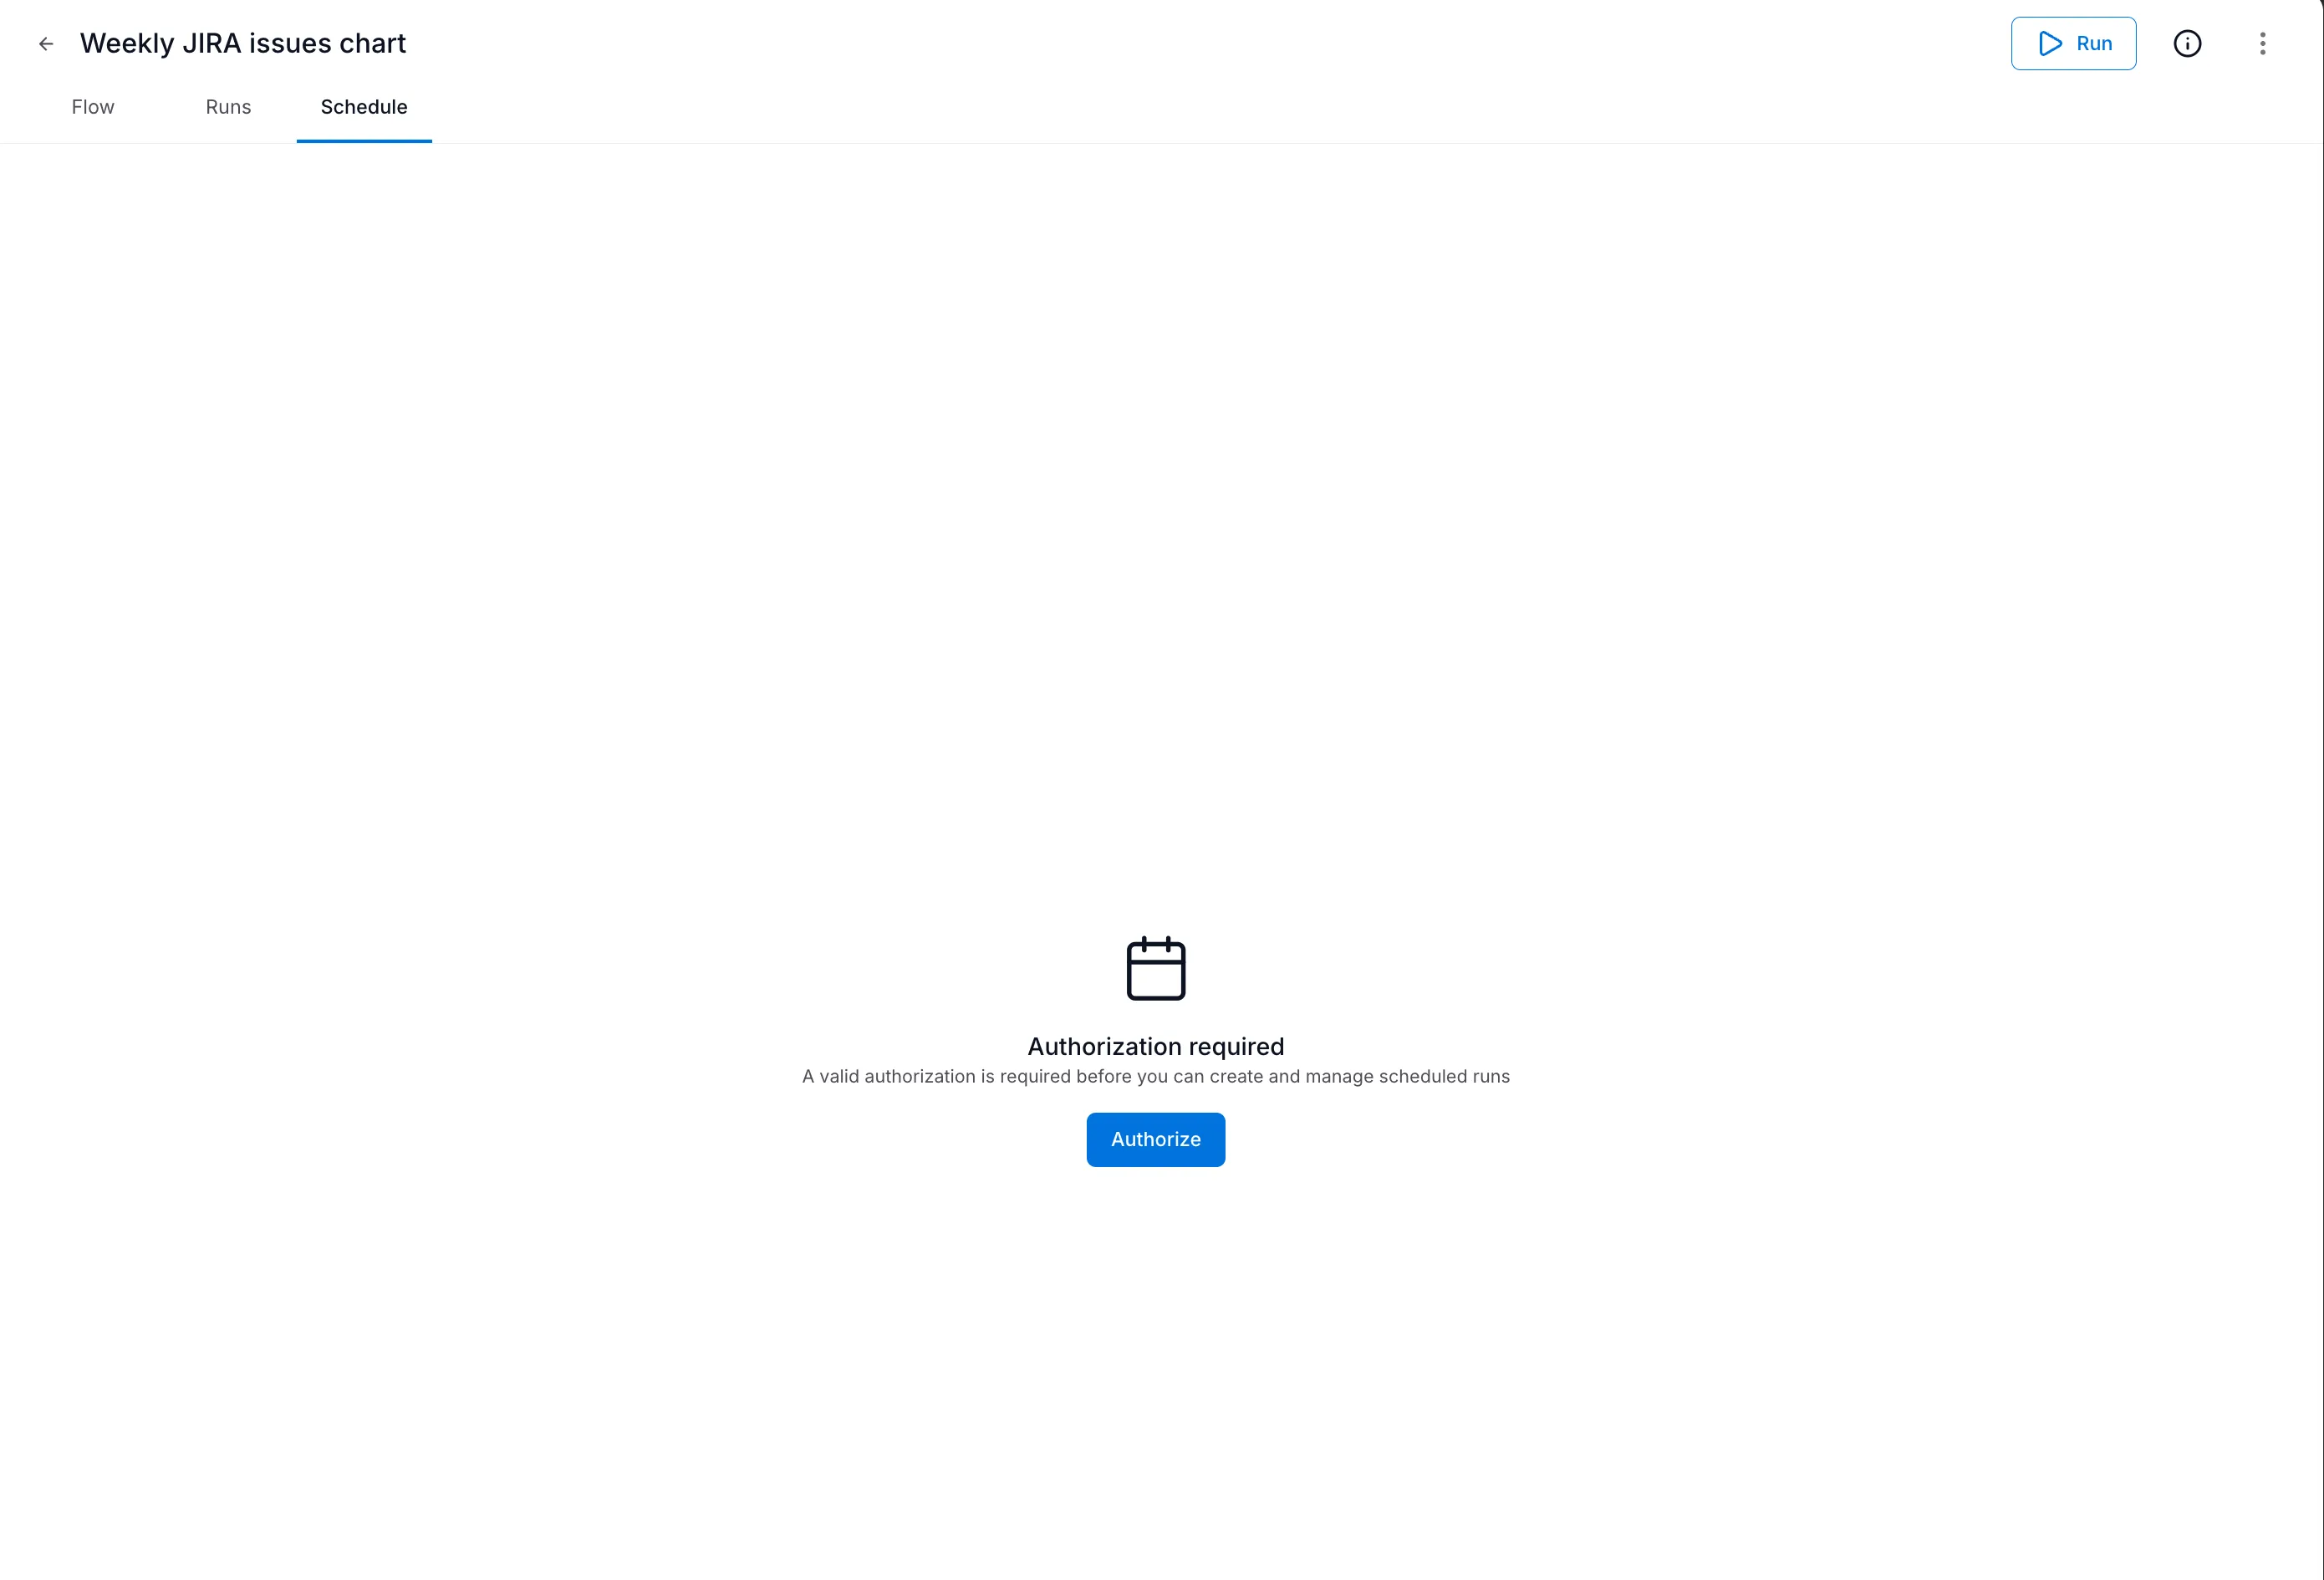
Open a flow and navigate to the Schedule tab
-
You’ll see an “Authorization required” message
-
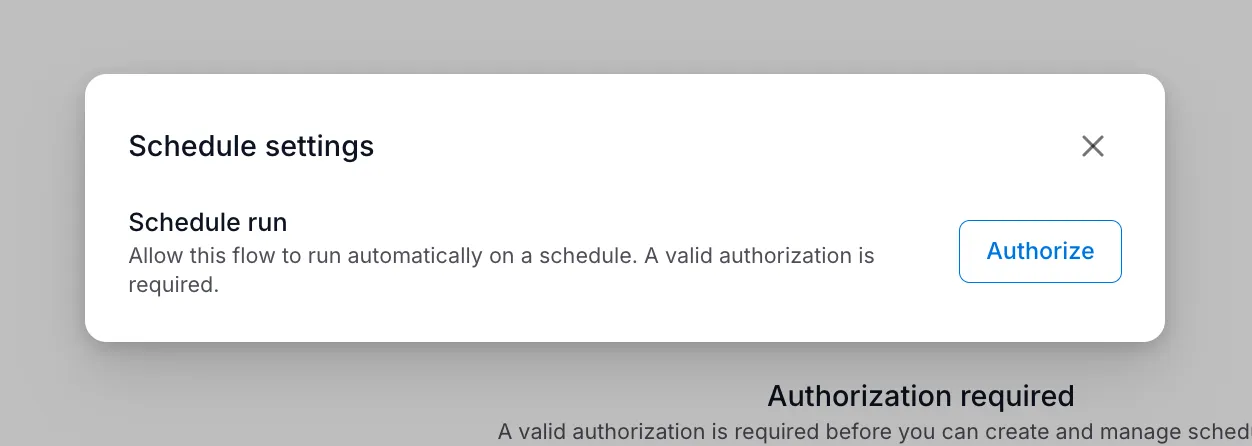
Click Authorize
-
Complete the authorization in the popup window
-
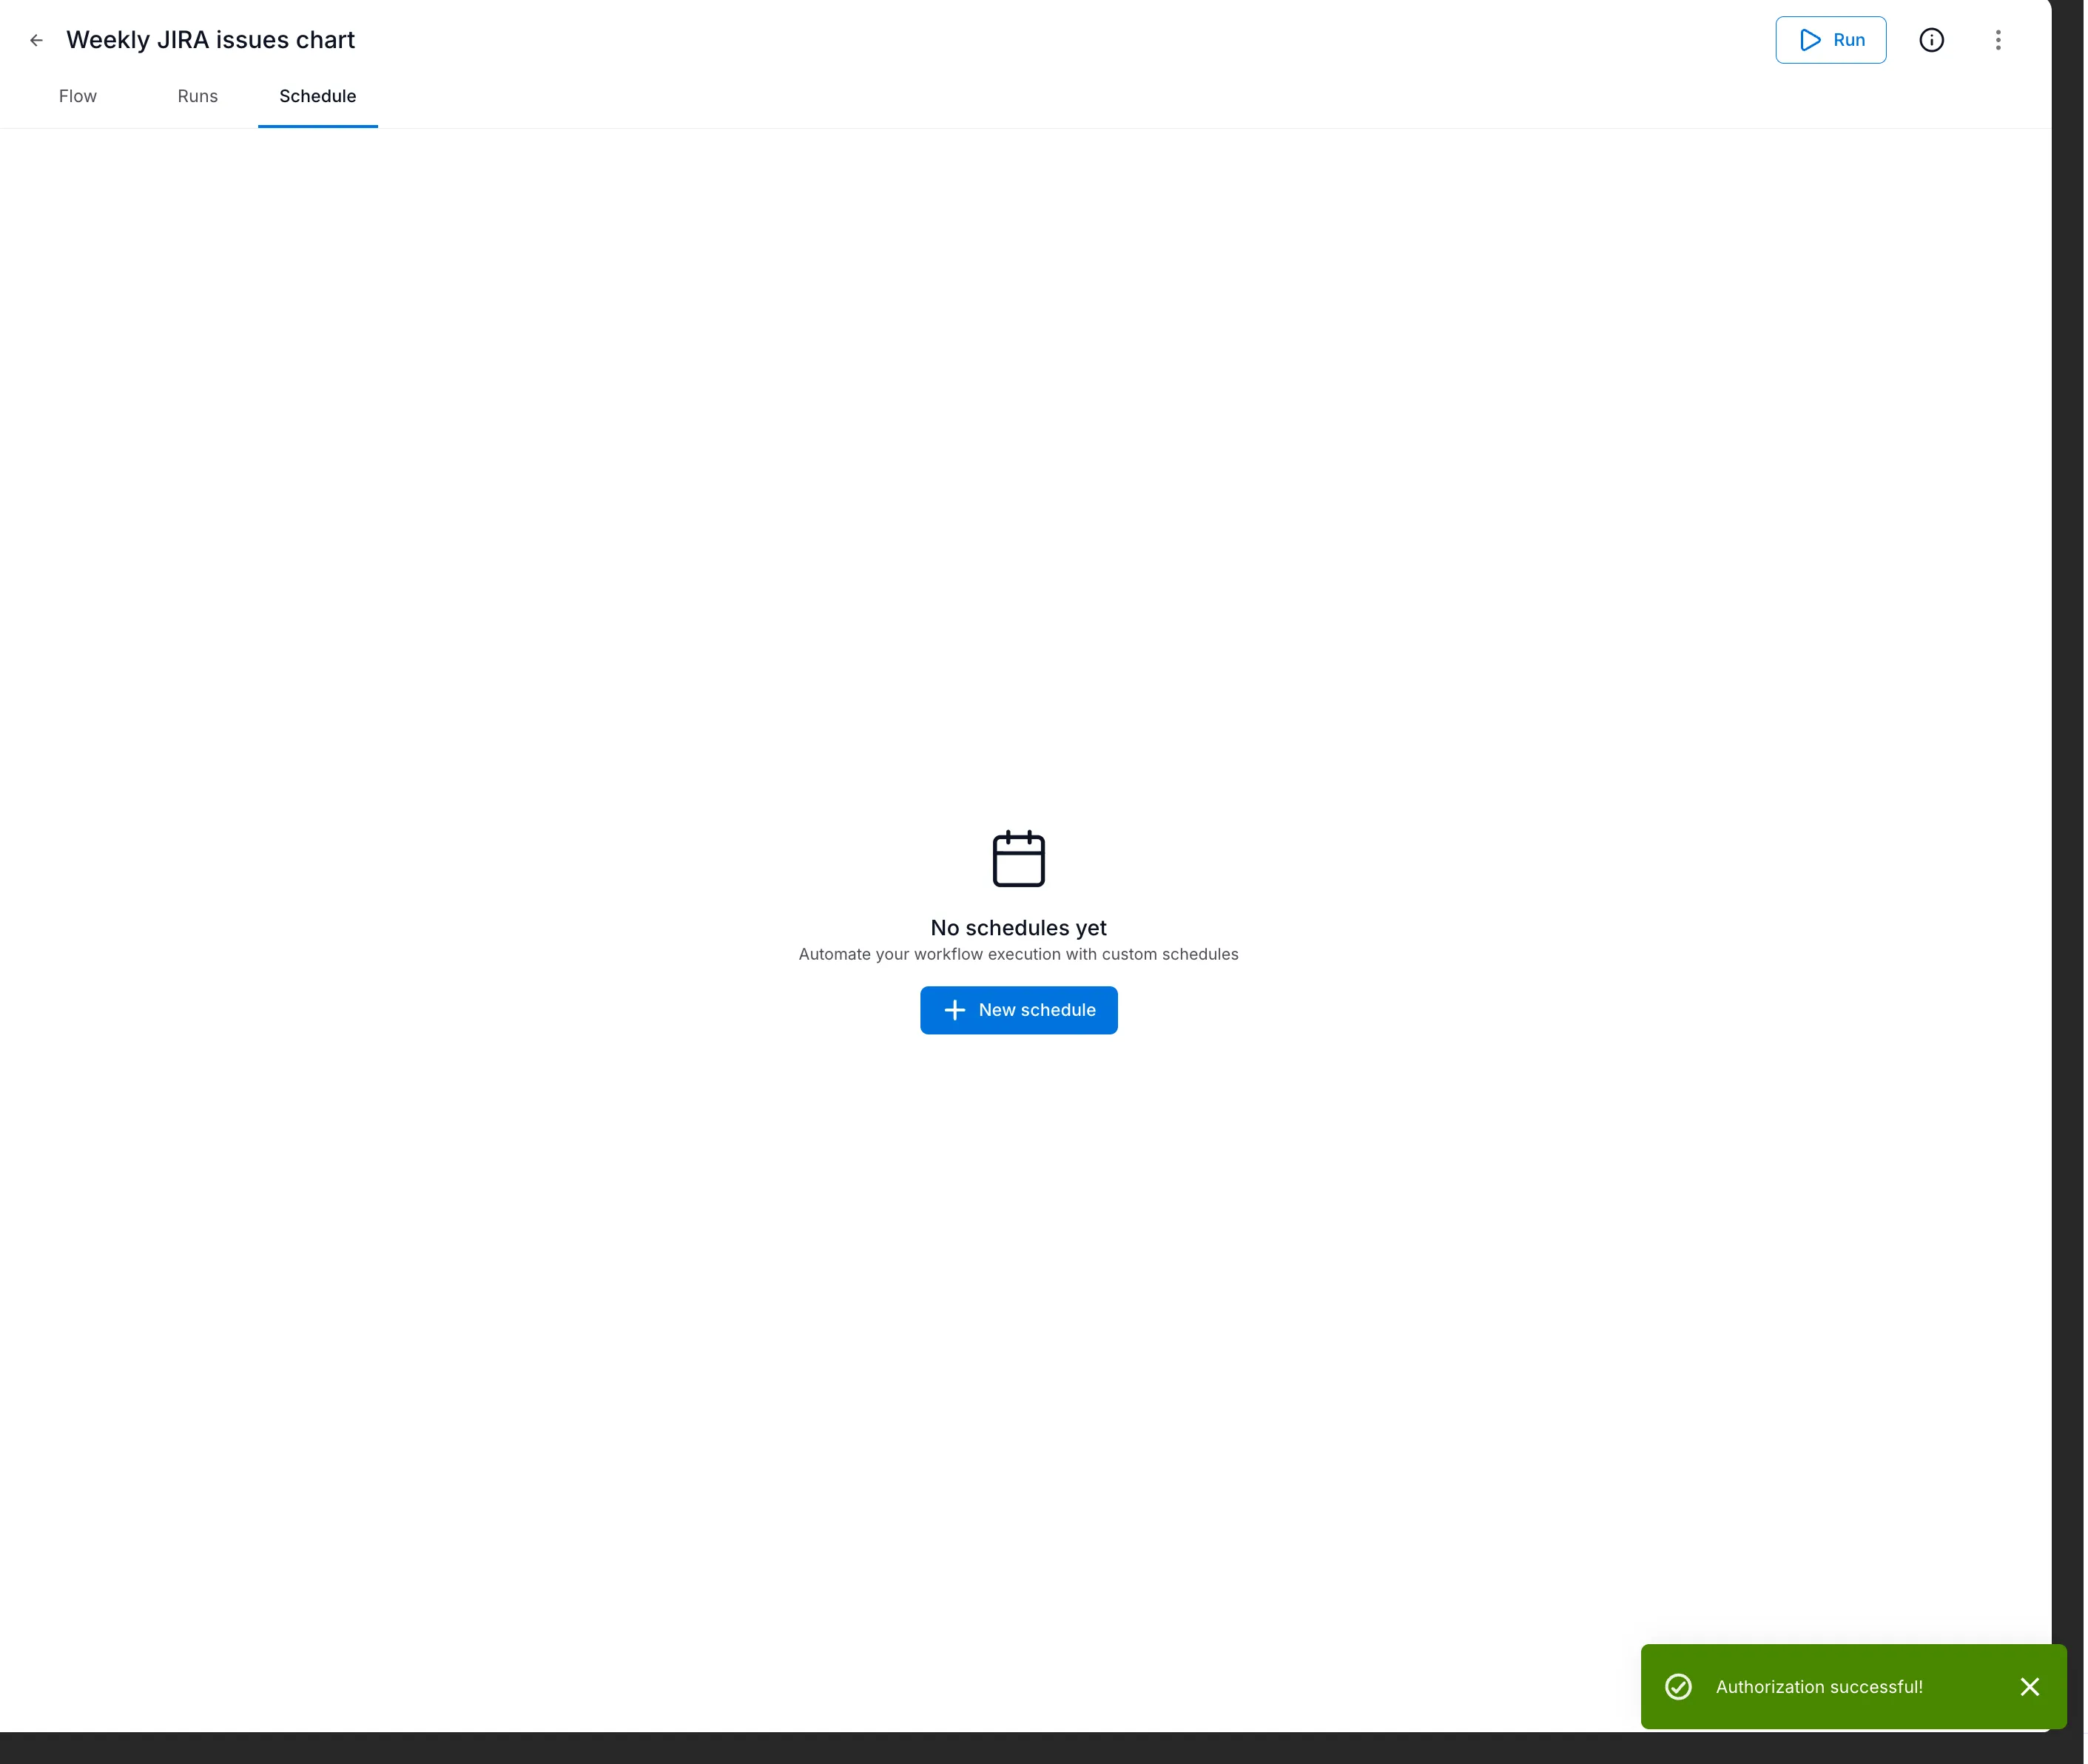
You’ll see a success confirmation
Creating a schedule
Section titled “Creating a schedule”Once authorized, you can create schedules for your flow.
-
Open your flow and go to the Schedule tab
-
Click + New schedule
-
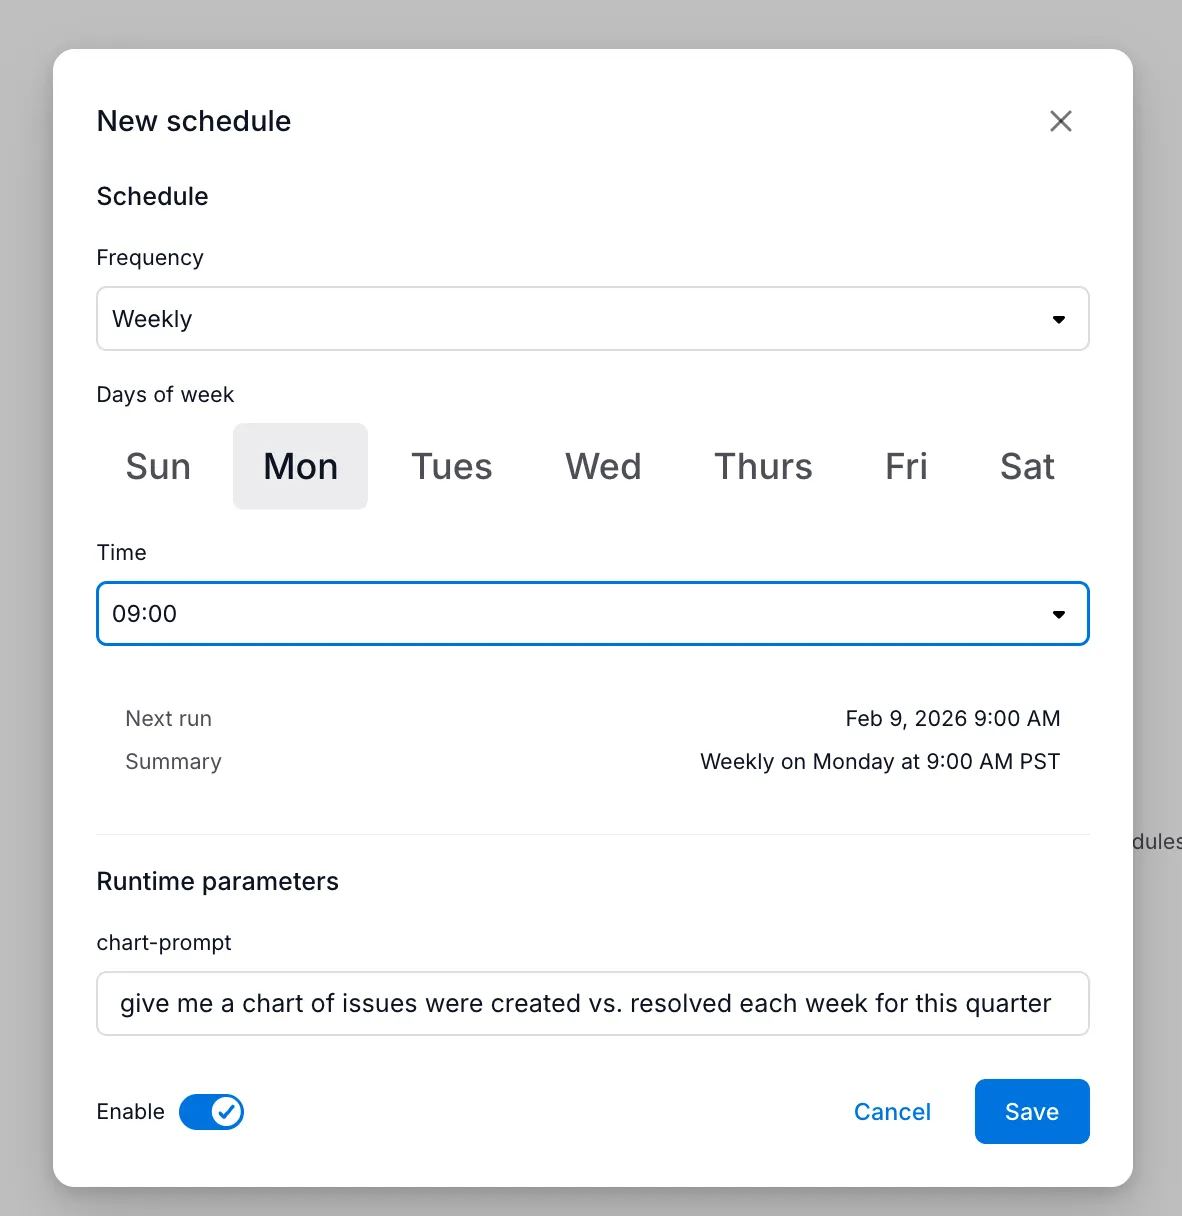
Configure the schedule settings:
-
Click Save
Schedule options
Section titled “Schedule options”| Setting | Description |
|---|---|
| Frequency | How often to run (Daily, Weekly, Monthly) |
| Days of week | For weekly schedules, which days to run |
| Time | What time to run (in your local timezone) |
| Runtime parameters | Values to pass to the flow’s inputs |
| Enable | Toggle to activate or pause the schedule |
The dialog shows a preview of when the flow will next run.
Managing schedules
Section titled “Managing schedules”After creating a schedule, it appears in the Schedule tab:

The schedule list shows:
- Summary — Human-readable description (e.g., “Weekly on Monday at 9:00 AM PST”)
- Run count — How many times the schedule has triggered
- Last run — When it last executed and whether it succeeded
- Enable toggle — Quickly enable or disable without deleting
Editing a schedule
Section titled “Editing a schedule”Click on a schedule to edit its settings. You can change the frequency, time, or runtime parameters.
Disabling a schedule
Section titled “Disabling a schedule”Toggle the Enable switch to pause a schedule without deleting it. The schedule retains its configuration and can be re-enabled at any time.
Deleting a schedule
Section titled “Deleting a schedule”Click the actions menu (three dots) and select Delete to remove a schedule permanently.
Viewing scheduled runs
Section titled “Viewing scheduled runs”Scheduled runs appear in the flow’s Runs tab alongside manual runs. Each run shows:
- When it executed
- Whether it was triggered by a schedule or manually
- Status (Completed, Failed, Running)
Click any run to see detailed step-by-step execution logs.
Troubleshooting
Section titled “Troubleshooting”Schedule not running
Section titled “Schedule not running”| Issue | Solution |
|---|---|
| Authorization expired | Re-authorize in the Schedule tab |
| Schedule disabled | Check the Enable toggle |
| Flow has validation errors | Fix errors and save the flow |
| Scheduling not available | Ask your admin to complete the admin setup |
Authorization errors
Section titled “Authorization errors”If you see “Authorization failed” in run history:
- Go to the Schedule tab
- Click Authorize to refresh your credentials
- Complete the authorization flow
Schema drift errors
Section titled “Schema drift errors”If a scheduled run fails with a “schema mismatch” or similar error, it means an agent or tool used in your flow was modified after the flow was created.
What causes this:
- An agent’s output fields were renamed or removed
- A tool’s required inputs changed
- The agent or tool was deleted entirely
How to fix it:
- Open the flow in the editor
- Check each step for validation errors (usually highlighted)
- Update the variable mappings to match the new inputs/outputs
- Save the flow and re-run
Next steps
Section titled “Next steps”- Variables and Context — Learn how data flows between steps
- Flows overview — Return to the main flows introduction